
Bitcoin paper wallet printer (DIY Piper)
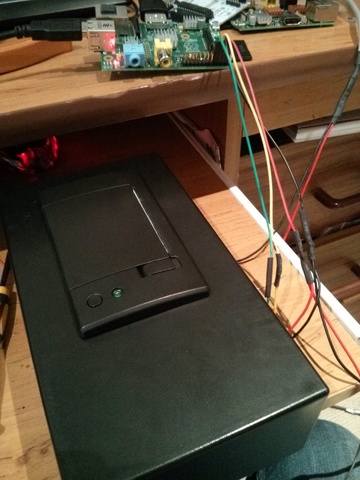 Nicely mounted in a hobby box
So I’ve been getting pretty into bitcoin recently and one thing that springs to mind is security and cold storage. It is normally such a pain to go through the whole secure process of making paper wallets and so I thought I’d try my hand at building a bitcoin paper wallet printer based off of the piper printer.
Parts:
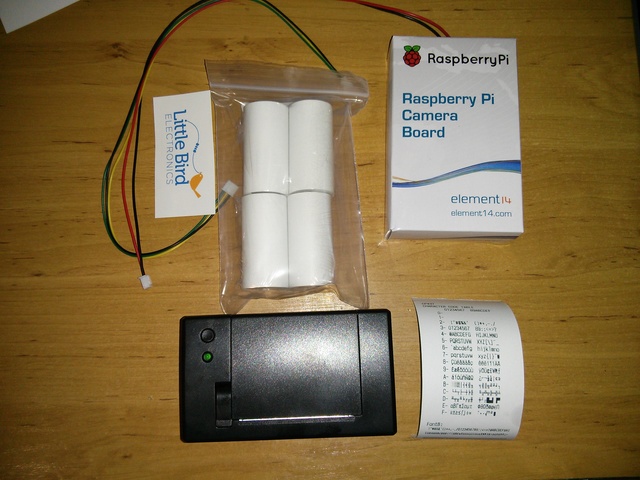 Printer, paper, camera and instruction print
- Raspberry pi
- SD Card
- Power supply (5VDC 2A)
- Thermal printer
- Thermal printer paper
- Assorted wire and tools
Setting up the hardware.
1. Download and image the latest version of Raspbian to your SD card. There’s a million and one tutorials on how to do this so I’m not going to cover that here.
2. Plug in your screen and keyboard, fire up your pi, go through the basic raspi-config, you could follow my suggestions below.
- Expand root partition
- Setup keyboard layout to your layout
- Change password
- Set Locale
- Disable SSH
- Change boot behaviour to boot to terminal
Once this is all done reboot and login using the username/password you set up in the raspi-config wizard.
3. Download some of the basics we’re going to need.1
2
3
4
5
6
7
8
9$ sudo apt-get update
$ sudo apt-get install git python-pip python-dev build-essential python-serial libpcre3 libpcre3-dev
$ sudo pip install --upgrade pip
$ sudo pip install --upgrade virtualenv
$ sudo pip install pillow qrcode pycrypto scrypt ecdsa slowaes
4. We need to allow the raspberry pi to use the serial port for the thermal printer. To do this we need to change the /boot/cmdline.txt file.
1 | $ sudo vi /boot/cmdline.txt |
change:1
dwc_otg.lpm_enable=0 console=ttyAMA0,115200 kgdboc=ttyAMA0,115200 console=tty1 root=/dev/mmcblk0p2 rootfstype=ext4 elevator=deadline rootwait
to:1
dwc_otg.lpm_enable=0 console=tty1 root=/dev/mmcblk0p2 rootfstype=ext4 elevator=deadline rootwait
5. Then we need to also change the /etc/inittab file1
$ sudo vi /etc/inittab
Comment the last line so1
T0:23:respawn:/sbin/getty -L ttyAMA0 115200 vt100
Becomes1
# T0:23:respawn:/sbin/getty -L ttyAMA0 115200 vt100
After this has been done you’ll need to reboot1
$ sudo reboot
6. To check that the printer is functioning unplug the printer completely, hold down the button, plug in the power to the printer whilst still holding the button. A diagnostics type page will be printed.
Plug in your thermal printer as shown below. One thing to note is that the polarity of the wires for the power plug on my Printer were incorrect and I had to rip them out and swap them.
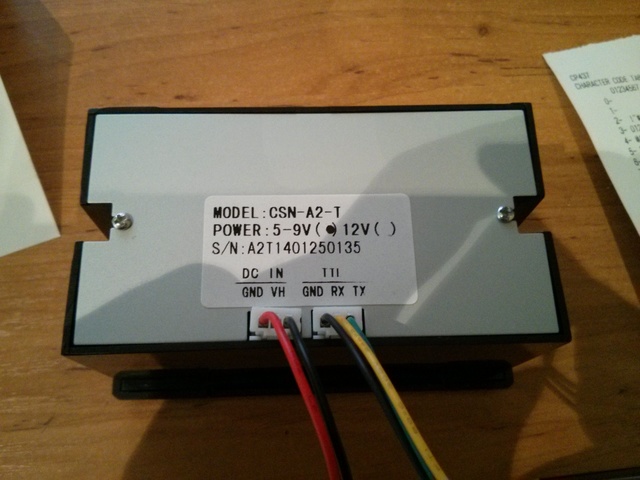 Bottom side of printer - Nobody else seemed to have a photo of this online, please note that this shows the cable pin header is wrong.
7. To test that the printer is plugged in and working correctly run the adafruit scripts that can be found here.1
2
3$ git clone https://github.com/adafruit/Python-Thermal-Printer.git
$ cd Python-Thermal-Printer/
$ python printertest.py
This should print out a test page that looks like the one in the middle below:
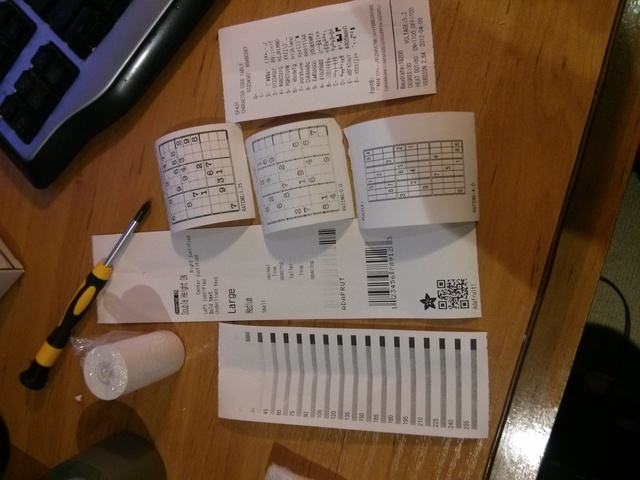 Some leftover demo prints]
Installing the DIY piper software:
1. Clone my modified piper code from https://github.com/ryanralph/piper, this is a fork from the original piperwallet code, you can use mine as a guide to make your own changes to the original. Most of the changes I’ve made are in relation to removing the database code as I don’t need it.1
$ git clone https://github.com/ryanralph/Piper.git
2. Download and build vanitygen. Vanitygen is a piece of software that is used to create custom bitcoin addresses. Some well known public examples of vanity addresses are “1NiNja1bUmhSoTXozBRBEtR8LeF9TGbZBN” which is the bitaddress.org donation address or “1BtcAus9WKuHr2C84FcRV5xJMTDqZ34dZE”, donation address for Bitcoin Australia.
PiperWallet have forked the original vanitygen and changed it to be silent until a key is found. To build:1
2
3$ git clone https://github.com/piperwallet/vanitygen.git
$ cd vanitygen/
$ make
Test that vanitygen is working by typing the following1
$ ./vanitygen 1RR
After a few seconds this will output an address and a private key. I’ve used RR as it’s my initials, you can enter in just about anything as long as it’s within the allowed characters of a bitcoin address. Keep in mind however the more characters you add to the address the longer it will take.
3. Move the .vanitygen file to the piper directory which should be ~/Piper1
$ mv vanitygen ~/Piper/
4. Assuming that’s all been done then you should be able to go ahead and print your first paper wallet using your DIY piper. Run python script like so:
$ python printkeys.py -f 1
This should print one paper wallet and forget the private key.
Further improvements:
Currently all I’ve really done is build a piper that requires me to login and issue a command tot print a paper wallet, in the near future I would like to make some changes to how it currently works:
- Different print layout, remove some of the flashiness
- Add a push button switch to automate the printing
- Remember or forget toggle switch
- Modify it to generate only vanity addresses of ‘1RR……’
Other future security considerations could include automatically printing BIP0038 passphrase protected private keys, one potential problem with this is that if the printer was stolen someone could likely recover the passphrase from the raspberry pi. I would also like to look into the capability of printing only BIP0011/BIP0016 multi-signature addresses that require a signature from a known brain wallet address (or other) to spend the paper wallet balance. I will be looking into all of these improvements and will likely post an update explaining any new features or upgrades that I make.
That’s all for now. When uni isn’t as busy and I’ve had a chance to make some improvements I’ll write a follow up to this post hopefully explaining the new features I’ve added on.